Unleashing My Inner Carpenter: The X-Base Obsession
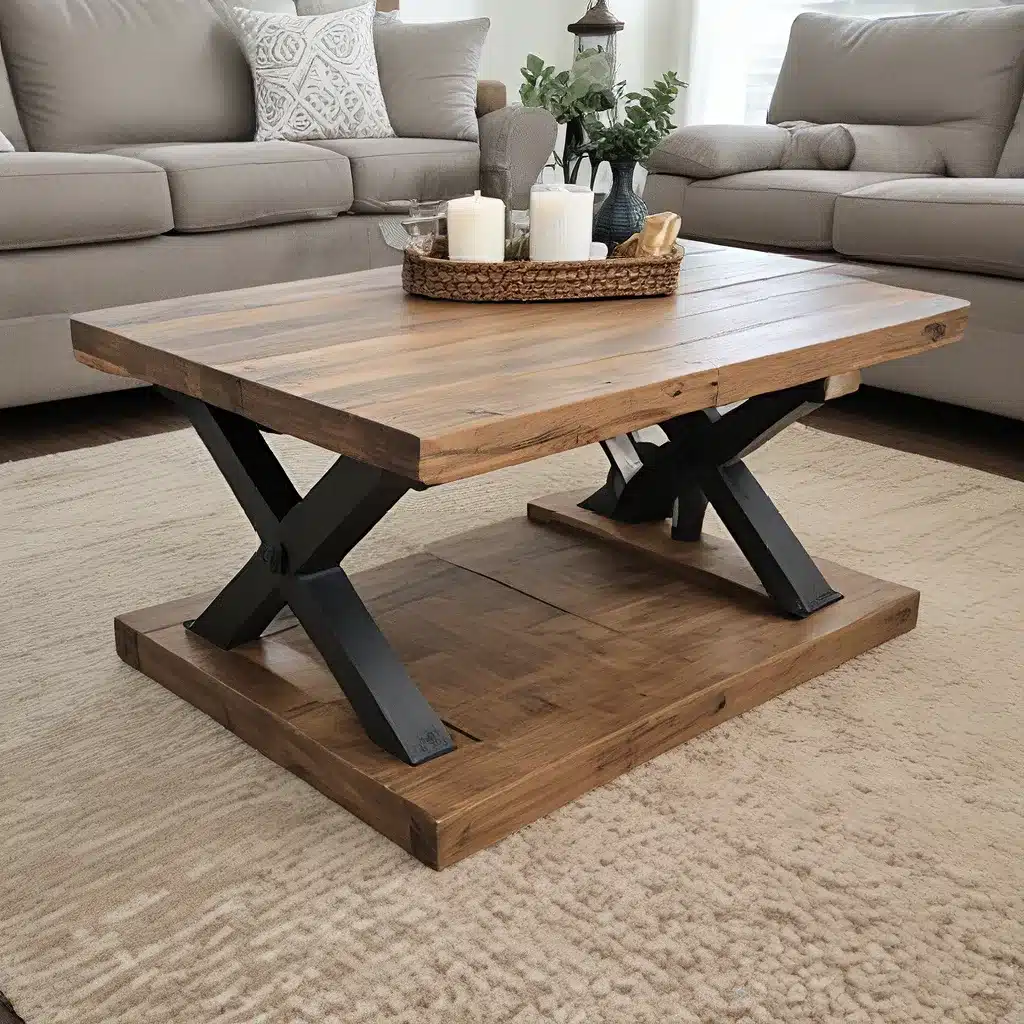
When I first stumbled upon those gorgeous X-base farmhouse table plans from the talented Ana White, I couldn’t help but feel a sudden surge of inspiration. The idea of crafting a beautiful, rustic coffee table from scratch had been simmering in the back of my mind for ages, and now it was finally time to bring it to life.
You see, I’ve always been a bit of a DIY enthusiast, but this project was going to be a true test of my skills. I’ll admit, the thought of tackling the intricate angles and precision cuts involved in an X-base design was a little intimidating at first. But hey, what’s the fun in playing it safe, right? I was determined to dive in headfirst and see where this DIY journey would take me.
Sourcing the Perfect Lumber: A Quest for Quality
As I began to plan out my X-base coffee table project, one of the first decisions I had to make was the type of wood to use. Now, I know what you’re thinking – how hard can it be to pick some lumber and get started? Well, let me tell you, it’s not as simple as it might seem.
After scouring the aisles of the big-box home improvement stores, I quickly realized that the quality of their wood just wasn’t up to par for the vision I had in mind. That’s when I decided to take a little road trip to a local lumber supply company. And let me tell you, it was the best decision I could have made.
The moment I stepped into that shop, I was greeted by the warm scent of freshly milled Douglas Fir. The grain patterns were simply stunning, and I knew I had to have it. Sure, it cost me a little more than the standard 2x4s, but I reasoned that this table would be a centerpiece in my living room for years to come. It was an investment worth making.
Measuring, Cutting, and Assembling: The Art of Precision
With my high-quality lumber in hand, it was time to get to work. Matt, my ever-patient partner in crime, took the lead on the measuring and cutting. I’ll never forget the way his brow furrowed in concentration as he carefully marked and tapered the edges of the base pieces with his trusty compound miter saw.
Once the initial cuts were done, we had to figure out the perfect angle for the X-shaped legs. Now, this is where the real challenge began. After a bit of trial and error, using a simple protractor tool, we finally landed on the ideal angle that would give us that classic, farmhouse-inspired look.
With the legs cut and the base secured to the hefty 4×4 center post, it was time to put it all together. We used a combination of pilot holes and wood screws to attach the legs, and I must say, the process was both nerve-wracking and exhilarating. Watching our creation take shape, piece by piece, was like witnessing a work of art come to life.
The Finishing Touches: Embracing the Rustic Charm
Now, I know what you’re thinking – the hard part is over, right? Well, not quite. The next step was to sand, stain, and seal this bad boy to perfection. And let me tell you, I took my sweet time with this part.
First, I spent a good half-hour sanding the entire table with my trusty orbital sander, ensuring that every surface was as smooth as glass. I toyed with the idea of going for a more distressed look, but in the end, I couldn’t resist letting the natural beauty of the wood grain shine through.
After a thorough vacuuming to remove any lingering sawdust, I applied a pre-stain wood conditioner. This step is crucial, as it helps to prevent the stain from being absorbed unevenly, resulting in a blotchy finish.
Next came the fun part – the staining process. I went with a rich Minwax Special Walnut stain, applying three coats to achieve the deep, rustic hue I was after. And let me tell you, watching that color develop was like watching a masterpiece come to life.
The Final Reveal: A Handcrafted Masterpiece
Finally, it was time for the finishing touch. Instead of going with a traditional polyurethane, I decided to opt for a dark wax finish. This gave the table a more subtle sheen and a slightly aged appearance, perfectly complementing the overall rustic vibe.
As I stepped back and admired our handiwork, I couldn’t help but feel a sense of pure pride. This wasn’t just a coffee table – it was a work of art, a testament to our creativity, and a piece that would forever hold a special place in our home.
Sofa Spectacular may have inspired me to take on this project, but the true satisfaction came from the journey itself. The planning, the problem-solving, the sheer joy of seeing our vision come to life – it all added up to an experience I’ll never forget.
A New Passion Ignited: What’s Next on the DIY Agenda?
Now that I’ve conquered the X-base coffee table, I can’t help but feel a renewed sense of excitement about the possibilities that lie ahead. I’ve already started sketching out plans for a potting bench and a custom media console, and I can’t wait to see where this new-found passion for woodworking will take me.
One thing’s for sure – I’ll be keeping a close eye on the latest trends and innovations in the world of DIY furniture, and I’ll be sure to share my experiences along the way. Who knows, maybe one day I’ll even start my own Centsational Furniture line. But for now, I’m just focused on enjoying the journey and embracing the thrill of creating something from scratch.
So, if you’re feeling inspired to tackle your own DIY project, I say go for it! The sense of accomplishment and the personal touch it adds to your living space is truly unbeatable. And hey, if you need any tips or advice, you know where to find me. I’ll be in my workshop, dreaming up the next big thing.


