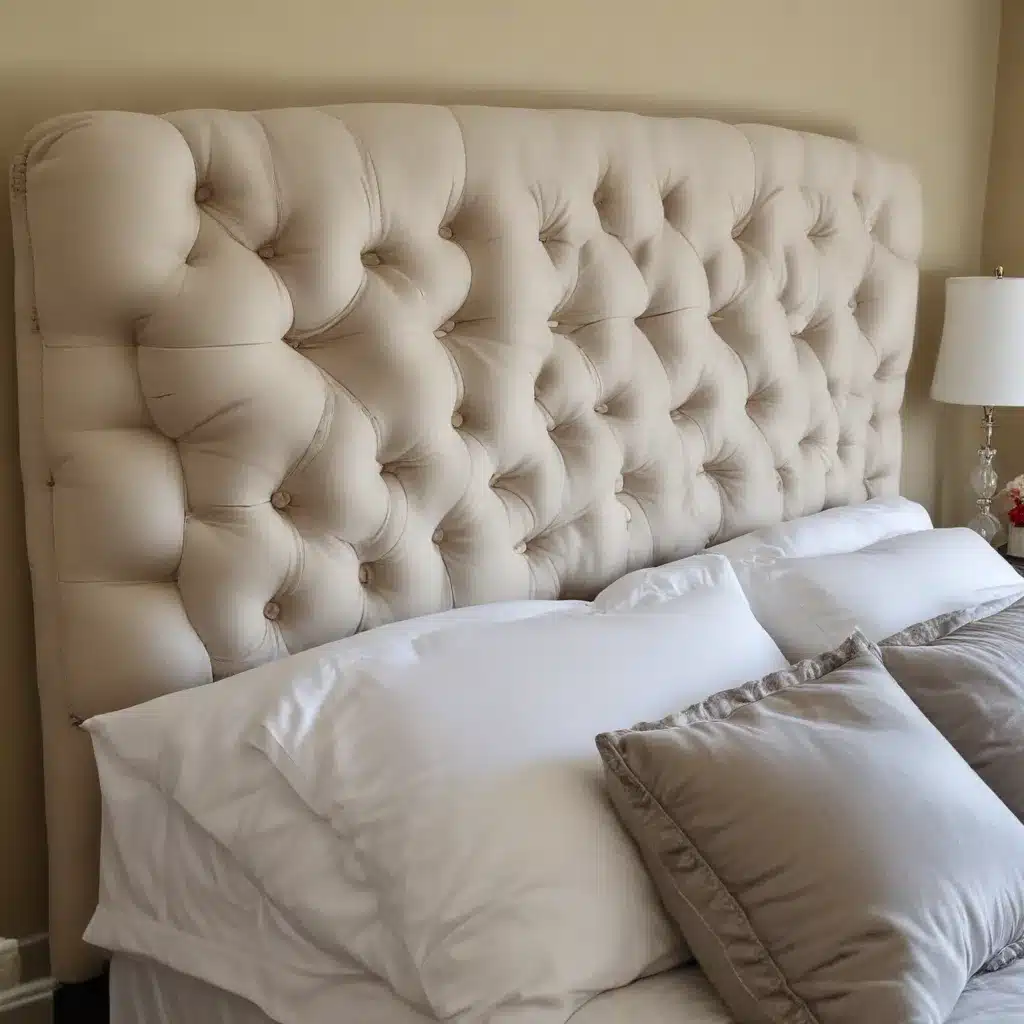
As a furniture specialist with years of experience in the industry, I’ve seen countless trends come and go. However, one element that consistently adds a touch of elegance and sophistication to any bedroom is a tufted headboard. Today, I’m excited to share my personal insights and a step-by-step guide on how to create your own tufted headboard. This project not only allows you to customize your bedroom decor but also gives you the satisfaction of crafting a high-end piece at a fraction of the retail cost.
Gathering Your Materials
Before we dive into the creation process, let’s talk about the materials you’ll need. In my experience, having everything prepared beforehand makes the project run much more smoothly. Here’s what you’ll need:
- Plywood or MDF board (sized to your bed)
- High-density foam (2-3 inches thick)
- Batting
- Fabric of your choice
- Buttons (covered or not, depending on your preference)
- Tufting needle
- Strong thread or upholstery twine
- Staple gun and staples
- Scissors
- Spray adhesive
- Drill with a bit slightly larger than your buttons
When selecting your fabric, consider the overall design of your bedroom. I’ve found that velvet creates a luxurious look, while linen offers a more casual, relaxed vibe. The choice of fabric can dramatically change the feel of your room, so take your time with this decision.
Preparing Your Base
The first step in creating your tufted headboard is preparing the base. Here’s how I typically approach this:
-
Cut your plywood or MDF to size. If you’re unsure about measurements, I recommend adding a few inches on each side of your bed’s width for a more substantial look.
-
Next, lay out your foam on the board. Use spray adhesive to secure it in place. This step is crucial for creating a smooth, even surface for tufting.
-
Cover the foam with a layer of batting. This adds an extra layer of softness and helps achieve a more professional finish. Staple the batting to the back of the board, pulling it taut as you go.
-
Now, it’s time to add your fabric. Lay it face down on a clean surface, place your foam-covered board on top, and start stapling from the center of each side, working your way to the corners. Be sure to pull the fabric tight to avoid wrinkles.
Marking and Drilling for Tufting
This next part requires precision and patience. Here’s my tried-and-true method:
-
Flip your board over and mark where you want your tufts to be. I typically use a grid pattern, but feel free to get creative. Just remember, symmetry is key for a polished look.
-
Once you’re happy with your pattern, drill holes at each marked point. The holes should be just large enough for your tufting needle to pass through easily.
-
Flip the board back over. You’ll see your drill marks through the fabric – these are your guides for tufting.
The Tufting Process
Now comes the fun part – actually creating those beautiful tufts. Here’s how I do it:
-
Thread your tufting needle with a long piece of strong thread or twine.
-
Start at one corner of your pattern. Push the needle through from the back of the board, through the foam and fabric.
-
Slip a button onto the thread, then push the needle back through the fabric, foam, and board, coming out very close to where you started.
-
Pull the thread tight to create the tuft, then secure it at the back of the board. I usually staple a wooden craft stick over the thread to hold it in place.
-
Continue this process for all your marked points.
Finishing Touches
Once all your tufts are in place, stand back and admire your handiwork! But we’re not quite done yet:
-
Check for any loose fabric between tufts and smooth it out, stapling at the back if necessary.
-
If you want to add extra flair, consider nailhead trim around the edges of your headboard.
-
Finally, attach your headboard to the wall or bed frame. The method will depend on your specific bed setup, but I typically use heavy-duty mounting brackets for wall-mounted headboards.
Creating your own tufted headboard is a rewarding project that can truly transform your bedroom. It’s a chance to express your personal style and add a bespoke touch to your space. Plus, every time you walk into your bedroom, you’ll feel a sense of pride knowing you crafted that beautiful piece yourself.
Remember, patience is key with this project. Take your time, especially during the tufting process, to ensure each button is secure and the fabric is smooth. The end result will be a stunning focal point for your bedroom that rivals any high-end furniture store piece.
If you’re looking for more inspiration or tips on furniture care and design, be sure to check out Sofa Spectacular. They offer a wealth of information on all things furniture-related, from selection to maintenance.
Happy crafting, and sweet dreams in your newly upgraded bedroom!
Choosing the Right Fabric for Your Tufted Headboard
When it comes to selecting the perfect fabric for your DIY tufted headboard, there are several factors to consider. In my years of working with furniture, I’ve learned that the right fabric can make or break a project. Here’s what I typically advise:
Durability
Your headboard will see daily use, so durability is key. Look for fabrics with high rub counts – this indicates how well the fabric will hold up to repeated use. Microfiber, for instance, is incredibly durable and easy to clean, making it a great choice for families with children or pets.
Texture
The texture of your fabric can add depth and interest to your bedroom. Consider these options:
- Velvet: Luxurious and soft, perfect for creating a glamorous look.
- Linen: Offers a more casual, relaxed vibe with a lovely natural texture.
- Leather: For a masculine or modern touch, leather can be an unexpected choice.
- Silk: While more challenging to work with, silk creates an undeniably elegant finish.
Color and Pattern
Your headboard will be a focal point in your bedroom, so choose a color or pattern that complements your existing decor. Here are some tips:
- Solid colors are versatile and timeless.
- Subtle patterns can add interest without overwhelming the space.
- Bold patterns can make a statement, but be sure they won’t clash with other elements in the room.
Practicality
Consider your lifestyle when choosing fabric. If you enjoy reading in bed, for example, a darker color might be wise to hide potential marks. If you have allergies, look for hypoallergenic options.
Remember, the fabric you choose will significantly impact the final look of your headboard. Take your time with this decision, and don’t be afraid to order samples to see how different options look in your space.
Advanced Tufting Techniques
Once you’ve mastered the basics of creating a tufted headboard, you might want to explore some more advanced techniques. Here are a few I’ve picked up over the years:
Diamond Tufting
This classic style creates a luxurious, quilted look:
- Instead of a simple grid, mark your tufting points in a diamond pattern.
- When tufting, pull the fabric diagonally to create defined folds between each tuft.
- This technique requires more fabric, so be sure to account for that when purchasing materials.
Capitone Tufting
This method creates a more dramatic, three-dimensional effect:
- Use thicker foam (3-4 inches) for your base.
- When tufting, pull the thread extra tight to create deep divots in the foam.
- This style works particularly well with leather or thick, sturdy fabrics.
Blind Tufting
For a more subtle look, try blind tufting:
- Follow the same process as regular tufting, but instead of using buttons, simply secure the thread at the back of the board.
- This creates gentle indentations in the fabric without the visual distraction of buttons.
These advanced techniques can take your DIY headboard to the next level, creating a truly professional-looking piece. As with any new skill, practice makes perfect. Don’t be discouraged if your first attempt isn’t flawless – each project is a learning experience.
Maintaining Your Tufted Headboard
Once you’ve put all that work into creating your beautiful tufted headboard, you’ll want to keep it looking its best. Here are my top tips for maintenance:
-
Regular dusting is crucial. Use a soft brush attachment on your vacuum cleaner to gently remove dust and debris.
-
For spot cleaning, always check the care instructions for your specific fabric. In general, a mild soap solution and a soft cloth can tackle most stains.
-
If your headboard is in a sunny spot, consider using curtains or blinds to prevent fabric fading.
-
Periodically check the tufting to ensure all buttons are secure. Tighten any loose threads as needed.
-
For leather headboards, use a leather conditioner every 6-12 months to keep the material supple and prevent cracking.
With proper care, your DIY tufted headboard can remain a stunning focal point in your bedroom for years to come.
Incorporating Your Tufted Headboard into Your Bedroom Design
Now that you’ve created your masterpiece, let’s talk about how to make it shine in your overall bedroom design. Here are some ideas I often share with clients:
Color Coordination
Your headboard doesn’t need to match your bedding exactly, but it should complement it. If you’ve chosen a bold fabric for your headboard, consider more subdued bedding to balance the look. Conversely, if your headboard is neutral, you have more freedom to play with color in your bedding and accessories.
Layering Textures
A tufted headboard adds wonderful texture to a room. Build on this by incorporating other textures through throw pillows, blankets, and rugs. This creates a rich, inviting atmosphere in your bedroom.
Lighting
Proper lighting can really make your headboard pop. Consider installing wall sconces on either side of the bed, or place table lamps on your nightstands to create a warm glow that highlights the texture of your tufting.
Wall Decor
Be careful not to overcrowd the wall space around your headboard. A few carefully chosen pieces of art can complement your headboard without competing for attention.
Bedside Tables
Choose nightstands that complement the style of your headboard. If you’ve gone for a glamorous tufted headboard, mirrored or metallic nightstands could enhance the luxe feel. For a more rustic tufted headboard, wooden bedside tables might be more appropriate.
Remember, your tufted headboard is now a key feature in your bedroom. Let it guide your design choices, but don’t be afraid to have fun and express your personal style throughout the rest of the space.
Creating a tufted headboard is more than just a DIY project – it’s an opportunity to transform your bedroom into a personalized retreat. The skills you’ve learned can be applied to other upholstery projects, opening up a whole new world of home decor possibilities.
As you embark on this creative journey, remember that perfection isn’t the goal – enjoyment of the process and pride in your finished product are what truly matter. So gather your materials, put on some good music, and get ready to create a beautiful, one-of-a-kind piece for your home.
And if you ever need inspiration or advice on other furniture projects, don’t forget to visit Sofa Spectacular. They’re a fantastic resource for all things related to home furnishings and decor.
Happy tufting, and may your DIY adventures continue to bring beauty and satisfaction to your home!


