Bringing Rustic Charm to Your Living Space
It was one of those moments where the stars aligned, and I found myself staring at the perfect coffee table – the kind that would instantly transform my living room into a cozy, inviting oasis. The only problem? The price tag from Restoration Hardware had me seeing double. There was no way I was shelling out three grand for a table, no matter how gorgeous it was.
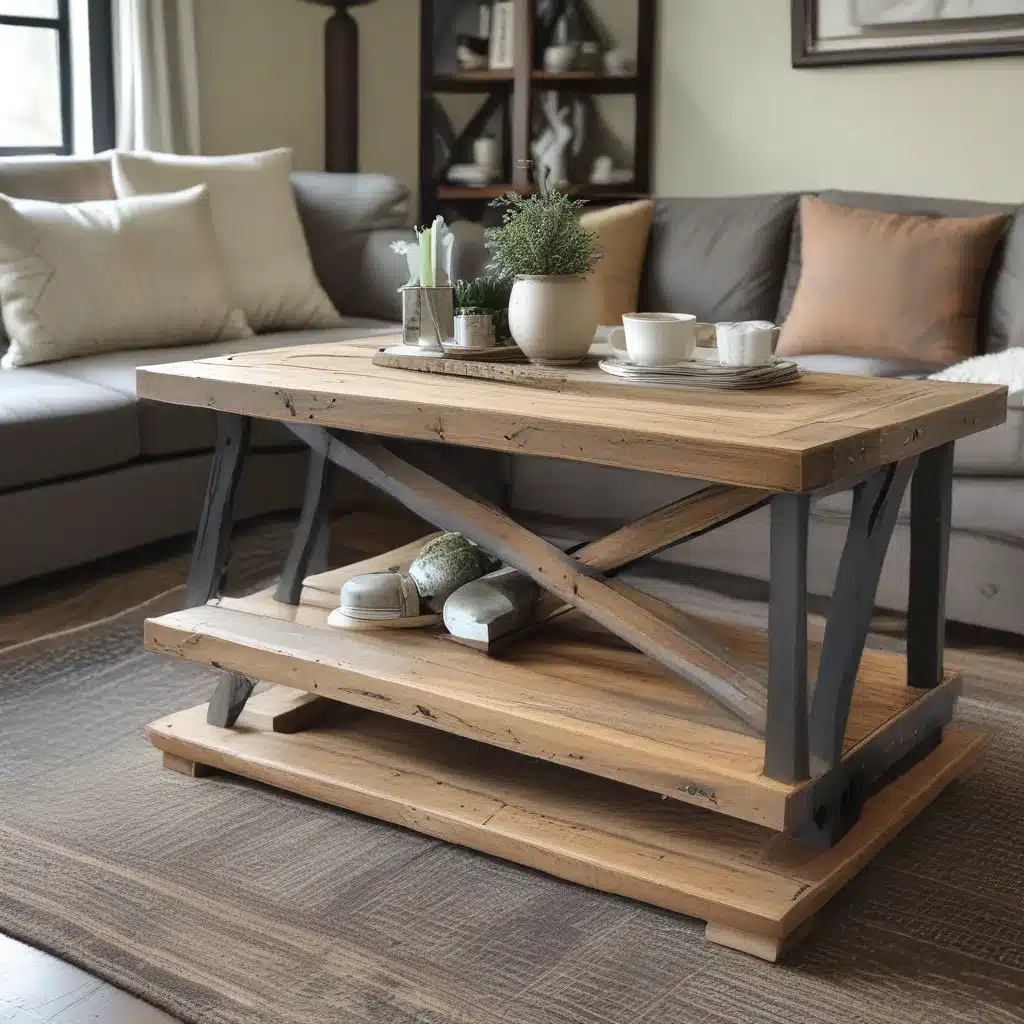
So, I did what any self-respecting DIY enthusiast would do – I decided to build it myself. And let me tell you, the end result is a masterpiece that would make even the most seasoned woodworker proud. Welcome to the story of my DIY rustic X-base coffee table – a journey filled with surprises, a touch of drama, and a whole lot of rustic charm.
From Inspiration to Craftsmanship
It all started a few months back when I stumbled upon a stunning rustic X-side table over at 100Things2Do. The moment I laid eyes on it, I knew I had to create a matching coffee table. But as they say, the road to DIY perfection is paved with a few challenges.
First, I had to figure out how to adjust the original plans to accommodate my living room’s dimensions. You see, my ginormous sofas demanded a table that was a hefty 60 inches long and 33 inches wide – a far cry from the original design. After a bit of head-scratching and some creative problem-solving, I had the perfect cut list that would give me the size I needed.
Tackling the Trickiest Bits
The next hurdle was the base shelf. The original plan called for two 1×12 boards, but with my larger dimensions, I ended up with a 25-inch gap in the center. Cue the dramatic music! I couldn’t very well have a gaping hole in the middle of my coffee table, now could I?
But fear not, my friends, I had a plan. I scavenged through my garage, found a few extra 1×12 boards, and set to work shaving them down to the perfect size. A few biscuit joints later, and voila – the gap was filled, and my coffee table was coming together beautifully.
Staining and Finishing Touches
Now, you may remember that pesky side table I built a few months back, the one where I stained and sanded it down three times before finally getting the right finish. I was determined not to go through that ordeal again, so I decided to try something new – a gel stain from Varathane in Weathered Grey.
I have to admit, I was a bit nervous at first, but the end result was nothing short of stunning. The gel stain gave me the Restoration Hardware-inspired color I was going for, without all the fuss and frustration. And let me tell you, a little goes a long way with this stuff – I barely used half a pint to cover the entire table.
Revealing the Masterpiece
As I stood back and admired my handiwork, I couldn’t help but feel a sense of pride and accomplishment. This coffee table is a true showstopper – big, solid, and heavy, just the way I like it. But the best part? I built it for a grand total of 80 Canadian dollars. Can you believe it?
My friends were over for tea the other day, and they were all in awe of my DIY masterpiece. It’s the perfect size for our family room, with plenty of room to set down those much-needed cups of chai and trays of freshly baked cupcakes. And let’s not forget the added bonus of being able to easily vacuum underneath – no more dealing with those pesky crumbs and dog hair!
A Custom Piece with Rustic Charm
As I run my hands over the smooth, weathered surface of my coffee table, I can’t help but marvel at how far I’ve come. From that initial inspiration to the final product, this journey has been a true labor of love. And you know what they say – the best things in life are the ones you create with your own two hands.
So, if you’re feeling inspired to add a touch of rustic charm to your living space, I highly recommend giving this DIY rustic X-base coffee table a try. Trust me, the sense of accomplishment you’ll feel when you step back and admire your handiwork is worth every minute spent sawing, sanding, and staining.
Who knows, maybe you’ll even find yourself dancing around the garage, snapping endless photos to share with your friends and family. After all, a little bit of DIY magic can go a long way in transforming a space and bringing people together. And that, my friends, is the true beauty of this rustic masterpiece.


