Bringing Rustic Charm to Your Living Room
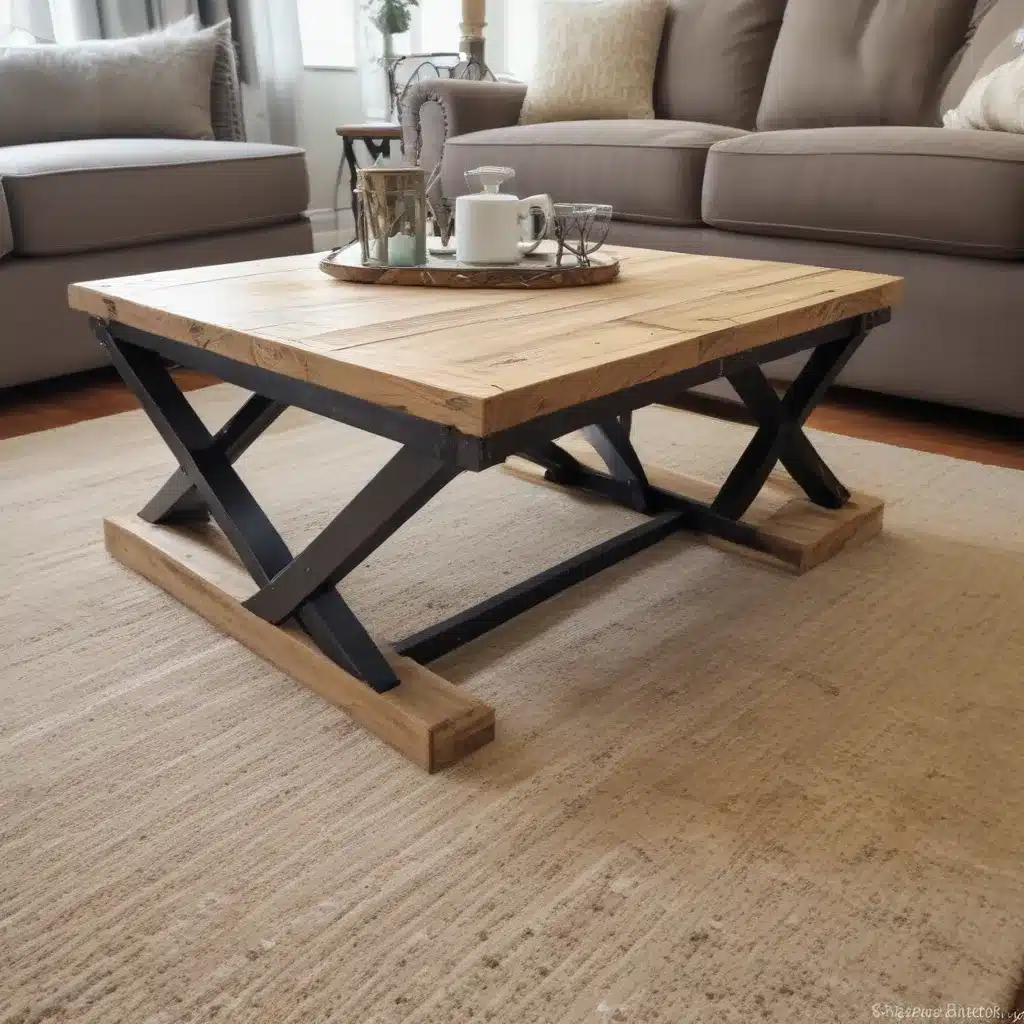
As a self-proclaimed furniture enthusiast and DIY aficionado, I’ve always been drawn to the warm, inviting character of reclaimed wood. There’s just something about the unique imperfections and weathered patina that instantly elevates a piece and makes it the focal point of any room. And when it comes to creating the perfect rustic centerpiece for my living space, I had my sights set on building a stunning X-base coffee table.
Now, I know what you’re thinking – “An X-base coffee table? Isn’t that a bit complex for a DIY project?” Well, my friends, let me tell you, with the right guidance and a little elbow grease, this seemingly intricate design is well within reach. In fact, I was able to craft my very own reclaimed wood X-base coffee table, and the process was surprisingly straightforward.
Sourcing the Perfect Materials
The first step in my DIY journey was to gather the necessary materials. Being the thrifty soul that I am, I knew I wanted to use reclaimed wood for this project. After all, what better way to give new life to old, weathered boards than by turning them into a beautiful piece of furniture?
I scoured the local salvage yards and antique shops, searching for the ideal planks. The criteria were simple – I was looking for wood with character, preferably a mix of different tones and textures to really capture that rustic vibe. After a bit of digging, I stumbled upon a stash of old barn boards that were just begging to be transformed.
Designing the X-Base
With my materials in hand, it was time to start planning the design. Now, I have to admit, the X-base structure had me a bit apprehensive at first. The thought of cutting all those angled pieces and getting them to fit together seamlessly was enough to make my head spin. But then I remembered the wise words of my favorite DIY blogger, Ana White: “Just take it one step at a time, and you’ll be sipping your coffee on a beautiful, handcrafted table in no time!”
Inspired by Ana’s rustic X-base coffee table plans, I decided to put my own spin on the design. Instead of using traditional 2x4s and 2x6s, I opted for sturdy 4×4 legs and 2×6 boards for the top and shelf. This not only added to the overall rustic feel, but it also allowed me to save a few bucks by repurposing some of the reclaimed wood I had.
Cutting and Assembling the Base
With my plans in hand, I set out to tackle the first step – cutting the angled pieces for the X-base. Now, I’ll admit, this part had me a little nervous. I mean, who wants to end up with a table that’s more lopsided than a three-legged stool? But thankfully, I had the brilliant idea to follow Pete’s advice and build a simple jig to ensure the cuts were precise.
Let me tell you, that jig was a game-changer! I was able to cut those 60-degree angles like a pro, and the pieces fit together like a dream. Once I had the base all assembled, I couldn’t help but do a little happy dance in my workshop. The X-shape was starting to take shape, and I could already envision the final product.
Crafting the Tabletop
With the sturdy base in place, it was time to tackle the tabletop. Now, I had originally planned to follow the traditional plans and use 2x12s for the bottom shelf, but I decided to get a little creative and use 2x6s instead. This not only helped me save a few bucks, but it also allowed me to narrow the overall width of the table, making it a perfect fit for my living room.
As I started assembling the top boards, I couldn’t help but admire the stunning variations in the reclaimed wood. The mix of weathered grays, warm browns, and the occasional knot or nail hole added so much character that I knew I had to showcase it. Following Pete’s lead, I decided to incorporate a breadboard-style top, which not only added visual interest but also helped to stabilize the wider boards.
Finishing Touches
With the structure complete, it was time to put the final touches on my rustic masterpiece. Now, I’ll be honest, I’m not the world’s greatest finisher, but I was determined to get this right. After a thorough sanding to smooth out any rough edges, I turned to my trusty can of Rustoleum Sunbleached stain.
As I watched the stain sink into the wood, I couldn’t help but be reminded of those old, weathered barn boards that had inspired this project in the first place. But I wasn’t done there – oh no, I wanted to really amp up the rustic factor. Following the advice from the team at AVH Furniture, I grabbed my trusty hammer and a few other tools and started distressing the surface.
Dings, dents, and even a few “worm holes” – I was determined to make this table look like it had been around for decades. And let me tell you, the results were nothing short of spectacular. The combination of the Sunbleached stain and the intentional distressing gave the table a stunning, lived-in look that fit perfectly in my cozy living room.
The Finished Product
As I stepped back and admired my handiwork, I couldn’t help but feel a sense of pride and accomplishment. This rustic X-base coffee table wasn’t just a piece of furniture – it was a reflection of my love for DIY, my appreciation for the character of reclaimed wood, and my desire to create something truly unique for my living space.
Whether you’re a seasoned woodworker or a complete beginner, I can’t recommend this project enough. With the right tools, a little elbow grease, and a healthy dose of creativity, you too can bring a touch of rustic charm to your home. So, what are you waiting for? Grab your power tools, head to the salvage yard, and let’s get building!


